Kubernetes for $10 a month
Purchase and provision nodes
I use Contabo VPS machines for virtual nodes. These are shared services which start at €4.50 a month for a 2-core machine.
To give full redundancy, a processing quorum at a Kubernetes cluster should contain at least three nodes. In reality, it is possible to run Kubernetes on a single node.
It all depends on the criticality of your processing. If your system can be down for a day or so, a single node may do. If you are running a business from the cluster, you should have at least two nodes. In the case of a financial institution, you would be looking at at least three nodes with a warm backup cluster in a separate region to cover for a catastrophic failure.
I chose two 6 cores VPS servers with Ubuntu 22.04 for my final cluster but started with a single node for the $10 a month budget.
Create the Kubernetes cluster
I first followed the excellent instructions from Oliver Radwell to create a single node cluster.
Create a test deployment
Check the nodes
Before we move forward, check that the cluster is ready with the following command:
kubectl get nodesOutput shows a status of ready on each node (for this example I was rebuilding as a single node cluster)

Deploy demo test
We are now ready to deploy to our new cluster!!
To keep things clean, we will create a new directory to hold our yaml configuration files.
mkdir ~/k8-demo
cd ~/k8-demo
We'll also try to keep our cluster tidy by keeping the demo within its own namespace.
kubectl create namespace demo
Let's check if it worked:
kubectl describe namespace demo
Now create a deployment file:
nano demo-deploy.yamlCopy the following configuration:
apiVersion: apps/v1
kind: Deployment
metadata:
  labels:
    app: demo
  name: demo
  namespace: demo
spec:
  selector:
    matchLabels:
      app: demo
  template:
    metadata:
      labels:
        app: demo
    spec:
      containers:
      - image: httpd
        imagePullPolicy: Always
        name: httpd
        ports:
        - containerPort: 80
          protocol: TCP
Deploy the configuration:
kubectl apply -f demo-deploy.yamlQuick check it is ready (the get command gives a quick summary by itself or can give more detail with the suffix "-o yaml" or "-o json" depending on you prefered format):
kubectl get deployment demo -n demoHopefully, the demo will be in a ready state.

If all is well, we should now have a running deployment on the cluster. To make use of the deployment, we need to take another step and create a service to manage the load between the pods of the cluster. In a simple example like this it doesn't matter too much but in production to handle load a deployment may create hundreds of pods.
So let's get on with it, first, create another yaml file.
nano demo-node-svc.yamlCopy and paste the following code:
apiVersion: v1
kind: Service
metadata:
  labels:
    app: demo
  name: demo
  namespace: demo
spec:
  type: NodePort
  selector:
    app: demo
  ports:
    - name: demo
      protocol: TCP
      port: 80
      targetPort: 80
      nodePort: 31515
Apply the yaml file:
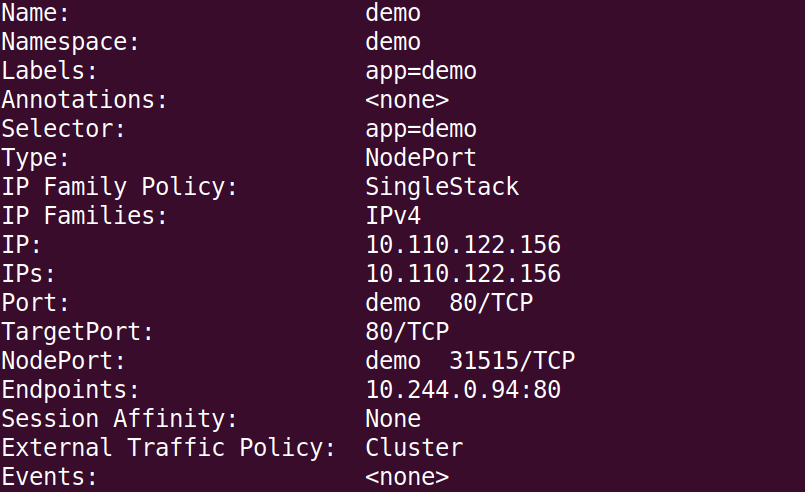
kubectl apply -f demo-node-svc.yamlNow let's check the the status:
kubectl describe svc -n demo

Prefect, the deployment is now ready to action requests. Let's give it a try!
curl localhost:31515
If it doesn't work and you are running a multiple-node cluster, try specifying the IP address of the other node(s) .
If the curl command worked, you can try the request from your browser.
http://[your ip]:31515
Conclusion
The above demo is a very simple example, especially with the provisioning of the service using the node port. In the next example, we will go through how to use ingress through a secure connection.