Securing connections
In my previous post, I detailed how to accept traffic into a Kubernetes cluster through ingress. This post will expand on how to secure these connections through a Secure Socket Layer (SSL) certificate.
To do this we will use a certificate manager and the services of the lovely people at Let's Encrypt (https://letsencrypt.org/).
What is an SSL certificate?
An SSL certificate is a stamp of approval that a Certificate Authority (CA) has verified the ownership of a URL by signing its public key.
A certificate is vital in the establishment of a secure connection between systems. Clients in the case of a Transport Layer Security (TLS) or Clients and Servers when Mutual TLS (MTLS) is been applied have a list of CAs for which they will accept certificates that they have signed.
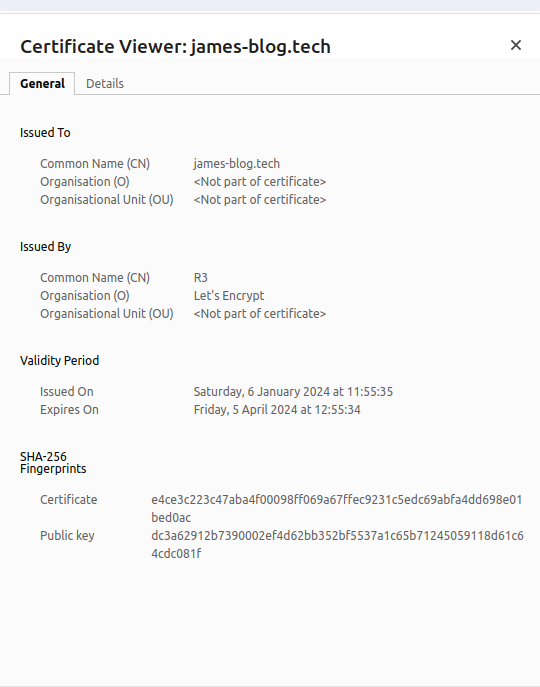
The certificate contains the following information:
- Hostname for which the certificate was issued
- CA who issued the certificate
- Public key of the host
- Expiry date of the certificate
A website certificate can be seen by pressing the button to the left of the URL.
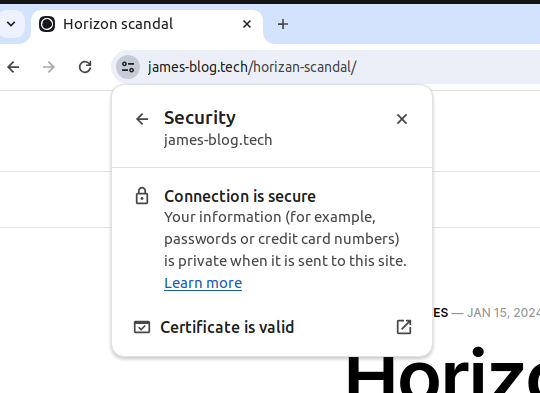
What is Let's Encrypt
Let's Encrypt is a free automated CA run on a non-profit basis which ensures security on the internet by issuing short-lived certificates to sites that can prove their identity.
We will install a certificate manager, which will call Let's Encrypt to generate a certificate and prove our identity.
First, we need to install the certificate manager.
kubectl apply -f https://github.com/jetstack/cert-manager/releases/download/v1.7.1/cert-manager.yamlCheck the manager is running.
kubectl get all -n cert-manager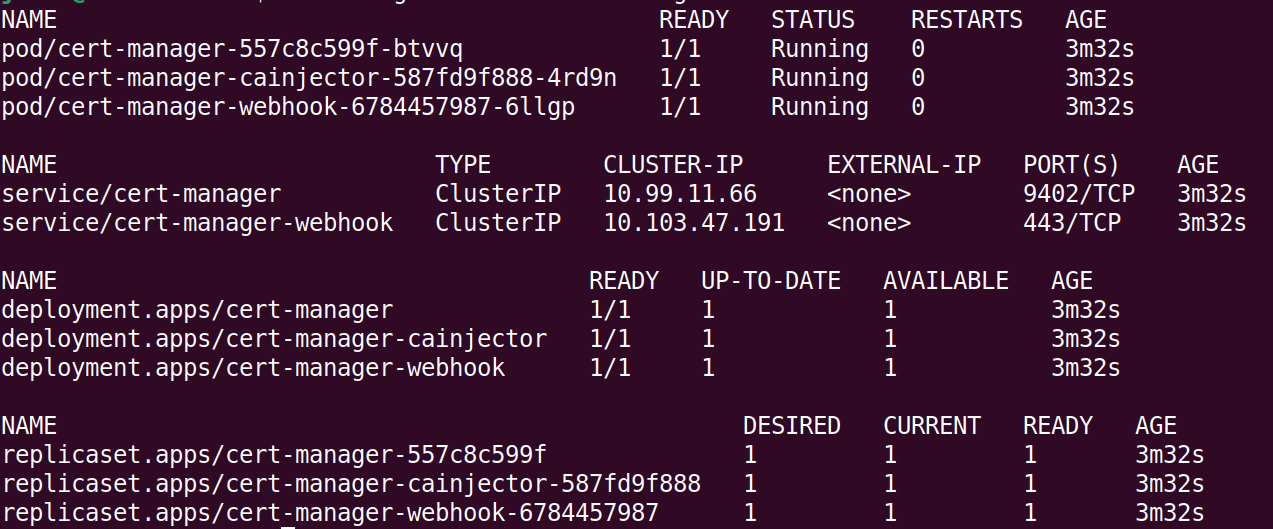
We are now ready to configure Let's encrypt. To start with we will use their staging instance, this is best practice as there are restrictions on the generation of the certificates. It is a very minor change to then use production certificates.
So create a file called demo-stagging-issuer.yaml with the following yaml:
apiVersion: cert-manager.io/v1
kind: Issuer
metadata:
  name: letsencrypt-stagging
  namespace: demo
spec:
  acme:
    server: https://acme-staging-v02.api.letsencrypt.org/directory
    email: test@james-blog.tech
    privateKeySecretRef:
      name: letsencrypt-stagging-key-pair
    solvers:
    - http01:
        ingress:
          class: nginx
Apply the file:
kubectl apply -f demo-stagging-issuer.yaml This creates the SSL key pair which we can check with the following command:
kubectl describe secrets letsencrypt-stagging-key-pair -n demo
Now let's link up the ingress to the Staging Issuer. By creating a file demo-ing-stagging.yaml with the following configuration:
apiVersion: networking.k8s.io/v1
kind: Ingress
metadata:
  annotations:
    cert-manager.io/issuer: "letsencrypt-staging"
  name: demo
  namespace: demo
spec:
  ingressClassName: nginx
  rules:
  - host: ingress-test.james-blog.tech
    http:
      paths:
      - backend:
          service:
            name: demo
            port:
              number: 80
        path: /
        pathType: Exact
  tls:
  - hosts:
    - ingress-test.james-blog.tech
    secretName: demo-stagging-cert
apply the file:
kubectl apply -f demo-ing-stagging.yaml Hope a certificate should now be present:
kubectl describe secret demo-cert -n demo
The browser will not authenticate the certificate but we should be able to see it in private browsing.
If you are having problems with your certificate, try describing the issuer, errors in the process normally show as events.
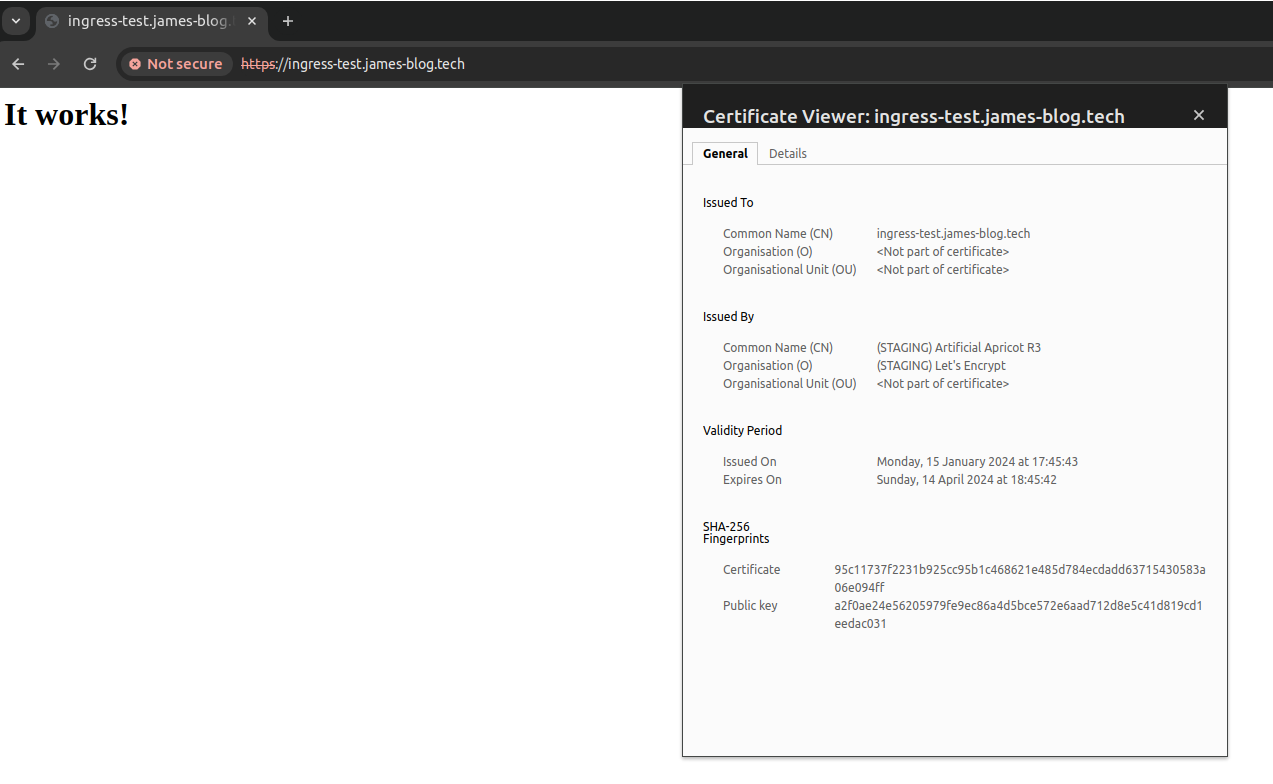
If you can see something like the above, after ignoring the warnings and selecting to view the certificate we are nearly there!
Ok, final set is to configure a production issuer. Create a file called demo-prod-issuer.yaml:
apiVersion: cert-manager.io/v1
kind: Issuer
metadata:
  name: letsencrypt-prod
  namespace: demo
spec:
  acme:
    server: https://acme-v02.api.letsencrypt.org/directory
    email: test@james-blog.tech
    privateKeySecretRef:
      name: letsencrypt-prod-key-pair
    solvers:
    - http01:
        ingress:
          class: nginx
Apply the file:
kubectl apply -f demo-prod-issuer.yamlCreate a new version of the ingress demo-ing-prod.yaml:
apiVersion: networking.k8s.io/v1
kind: Ingress
metadata:
  annotations:
    cert-manager.io/issuer: "letsencrypt-prod"
  name: demo
  namespace: demo
spec:
  ingressClassName: nginx
  rules:
  - host: ingress-test.james-blog.tech
    http:
      paths:
      - backend:
          service:
            name: demo
            port:
              number: 80
        path: /
        pathType: Exact
  tls:
  - hosts:
    - ingress-test.james-blog.tech
    secretName: demo-prod-cert
Apply the file:
kubectl apply -f demo-ing-prod.yaml
Finally, try the URL in the browser (might have to refresh a few times):
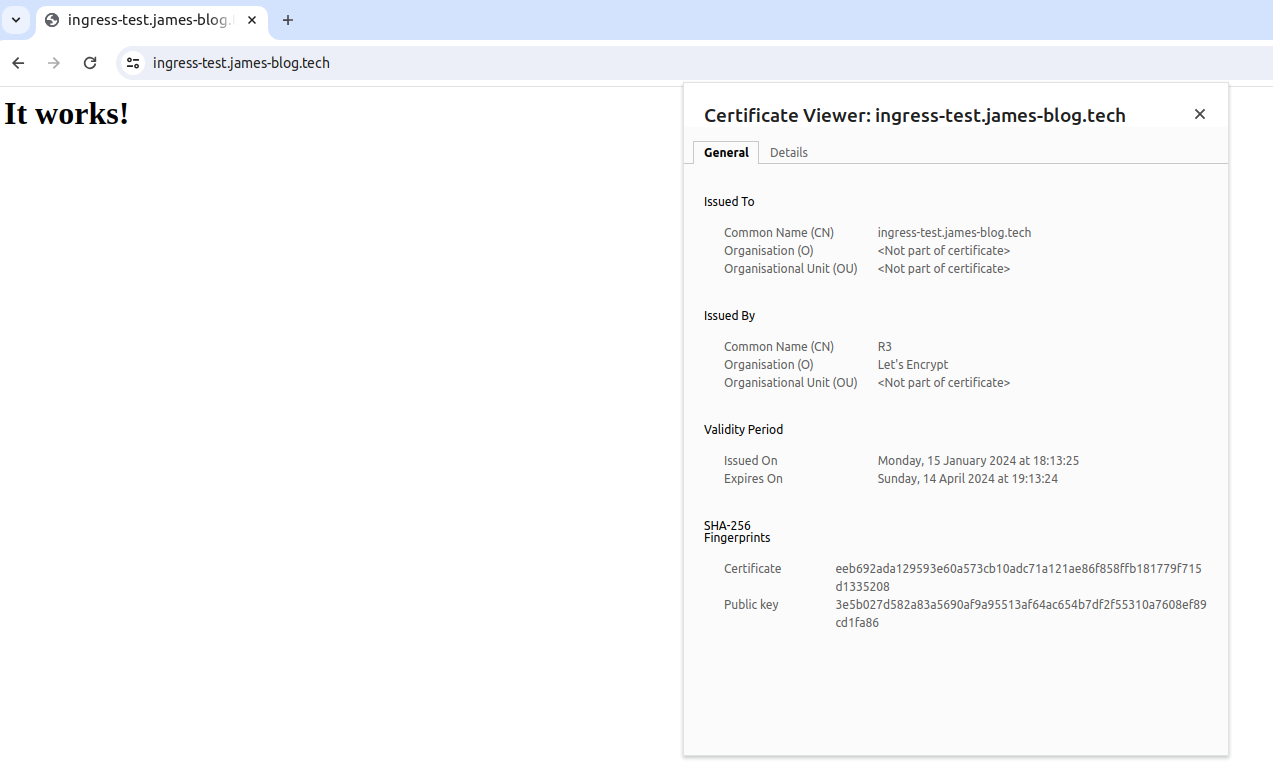
Congratulations, you now have a secure connection for your traffic to your ingress cluster!
If you are having problems with your certificate try describing the issuer, errors in the process normally show as events:
kubectl describe issuer letsencrypt-prod -n demo